


Decoupage is a crafting style that I have been considering for a while now. Over the years I have seen so many cute items created in this manner and you really can’t get any easier supply wise then paper and glue right? However, it wasn’t until I walked into Dollar tree, saw some Mod Podge and recalled this super cute post by Bexa that I decided to really give it a try! A dollar store decoupage project seemed like a perfect addition to our Dollar Store Craft series!
This is a craft project that I feel would be great for any age! There are no hot glue guns or sharp objects to worry about and it’s not complicated or overly frustrating for little fingers and minds. If your family enjoys making homemade gifts this could be a really sweet idea.
Dollar Store Decoupage – A Simple Project for Anyone!
Dollar Store Decoupage – Supplies from the Dollar Tree
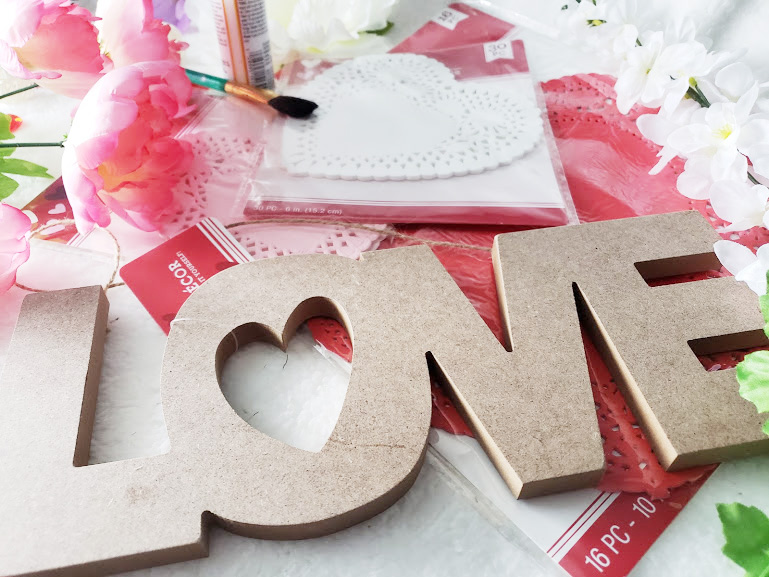
- An Item to decoupage – I chose this cute ‘paint it yourself’ love sign from the Valentine’s day section of the Dollar tree but almost anything will work! I have seen candle holders, pots, decorative boxes and picture frames in the past. As long as the glue will stick to it you’re good!
- Glue – I used Mod Podge, it’s often recommended because it dries clear and glossy but I expect that some liquid Elmers glue would also work pretty well!
- Paper – I actually used some heart-shaped doilies for this project. The solid colors also meant I didn’t have to worry about matching any sort of pattern. I suggest looking for a relatively thin paper or you might have trouble wrapping it around edges. Tissue paper would probably work fine if you were careful not to rip it.
- Paint Brush – To help spread the paint around (though I will be honest and say I used my fingers too!)
- A Small dish or tray – To put your glue in.
Total Cost – Approx 8 dollars. If you buy three packs of paper and two tubes of glue, though I only ended up using one tube of glue I like to buy extra when it comes to those sort of things. There is nothing worse than running out of an essential halfway through a project!

Dollar Store Decoupage – Tips
Decoupage is a craft technique which calls for gluing bits of paper onto a hard surface. You can get really fancy by using patterned cut-outs and metallic foils but the basics are pretty self-explanatory! None the less there are a few things I figured out along the way which might make things so smoother for you!
Protect your Workspace Surface.
I neglected to do this because I’m an adult and there is no way I would get glue all over the place right? Ha! Wrong! I spent a good bit of time afterward scraping bits of glue off my table. Thankfully my table is pretty hardy and this wasn’t a problem but I could have avoided the cleanup time by laying down some plastic first. You are working with glue, things can get messy. Especially if you involve kids!

Plan your Design
While you can almost certainly wing it and still come up with a cute project it’s easier to have a bit of a plan. Especially if you war working with several different colors or some sort of patterned paper. Since I was working with three different colors I knew I wanted to make sure that they were fairly equally represented on the finished piece. Since my paper had a lace effect I also wanted to keep that in mind.

Work with Small Pieces of Paper
Trying to glue a huge piece of paper on your project can be a pain, especially if there are corners you have to deal with. Some people like to work with strips. I found laying the doily over my project piece to find the look I liked and tearing it into that shape worked well enough for me.
Smaller pieces of paper were easier to glue down without getting wrinkles or tears, I also found it easier to wrap them around the edges without having to deal with thick folds or bulges that refused to lay flat.

Dollar Store Decoupage – Directions
- Protect your workspace and make clean up a breeze by laying down a layer of plastic or wax paper on your work surface.
- Work out a basic plan for your project and keep your paper close at hand.
- If you know exactly what you want your project to look like feel free to precut (or rip) your paper before starting and lay the pieces aside.
- Paint a thin layer of glue on your project surface using a paintbrush.
- Place a piece of your paper on the glue then paint a second layer over top to seal it on. Be generous with your glue and try to keep your paper from wrinkling. If necessary use your fingers to help smooth down your paper and even out the glue.
- Continue adding layers of paint and glue to your project until it is completely covered. The beauty with decoupage is that if you don’t like something you can just glue over top of it!
- Allow your project to dry completely and enjoy!

Have you Ever tried Decoupage?

 < />
< /> < />
< />


Yay!! I LOVE this post Kristin! Thank you so much for the mention and I’m so happy I encouraged you to give decoupage a try! Your finished project looks awesome, the colours look so good together and the heart shaped doilies is a fantastic idea, so creative! This is the perfect craft project for Valentines Day! Thank you for sharing your tips as well, planning ahead sounds like a sensible idea, especially when working with different colours or patterns. This has inspired me to try more than one paper when I do this next time, I just kept it to one pattern but a mix of colours looks great! You have done an fabulous job! <3 xx
Bexa | http://www.hellobexa.com
Thanks so much Bexa! So glad you liked the post! Your creative posts are always inspiring and I look forward to seeing your next project!!
This looks so pretty! I love the design that you chose. It’s amazing that things like this can be done for such a small amount too. This is the perfect kind of craft project for Valentine’s because it wouldn’t look out of place the rest of the year. Great job x
Sophie
http://www.glowsteady.co.uk
The dollar store is probably my favorite crafting store. You might have to get a bit creative but you can come up with so many cute projects for hardly anything at all! So glad you liked the post, thanks for reading!
This is so cute! I can’t help but think that finished sign would be perfect as a blog prop for the background photos too! I’m sure I have tried decoupage before at some point, I love getting crafty and messy, especially on rainy days! Something like this would be so cute and a great budget idea to do for a wedding 🙂
Alice Xx
I would be lying if I said I haven’t already used it for some photos haha! But I love craft projects that double in use, if it looks pretty, works for some seasonal decor AND I can use it for blog pictures than that’s the perfect craft haha!
Hi, Very Good Article. I really appreciate it. Now you got one regular visitor to your website for new topics. Keep up the Good Work Thanks for always sharing. Nicole Graham
Your welcome! So glad you enjoyed the article!